Mastering Aspect Ratios: How to Crop Images for Instagram, YouTube & TikTok
Summary: Uploading a photo to social media often ruins it with awkward cropping or black bars. The solution is to crop your image to the correct "Aspect Ratio" *before* you post. This guide explains which ratio to use for every platform and how to do it in one click.
We have all been there. You take a beautiful landscape photo, upload it to Instagram, and suddenly the sides are chopped off. Or you upload a vertical video to YouTube, and it has ugly black bars on the left and right.
The culprit is the Aspect Ratio. Every platform has a preferred shape for its content. If you don't match that shape, the platform will force your image to fit, usually with terrible results.
We just added a powerful new feature to EasyImageCR.in that lets you fix this instantly. Here is your master guide to the correct ratios.
The "Big 3" Ratios You Must Know
1. The Square (1:1)
- Best For: Instagram Posts (Classic), LinkedIn Profile Pictures, Facebook Posts.
- Why: It takes up a solid amount of screen space on mobile and desktop. It is the safest, most universal format.
2. The Vertical Portrait (4:5)
- Best For: Instagram Posts (Modern Standard).
- Why: This is the "Pro" choice for Instagram. A 4:5 image is taller than a square, meaning it takes up more vertical space on your follower's phone screen. More screen space = more attention = more likes. Never post a landscape photo on Instagram if you can crop it to 4:5!
3. The Story / Reel (9:16)
- Best For: TikTok, Instagram Reels, Instagram Stories, YouTube Shorts.
- Why: This fills the entire phone screen. If you upload a horizontal video to TikTok, it looks tiny. Always crop to 9:16 for vertical content.
4. The Widescreen (16:9)
- Best For: YouTube Thumbnails, Facebook Link Previews, X (Twitter) Posts.
- Why: The classic "movie" shape. This is mandatory for YouTube.
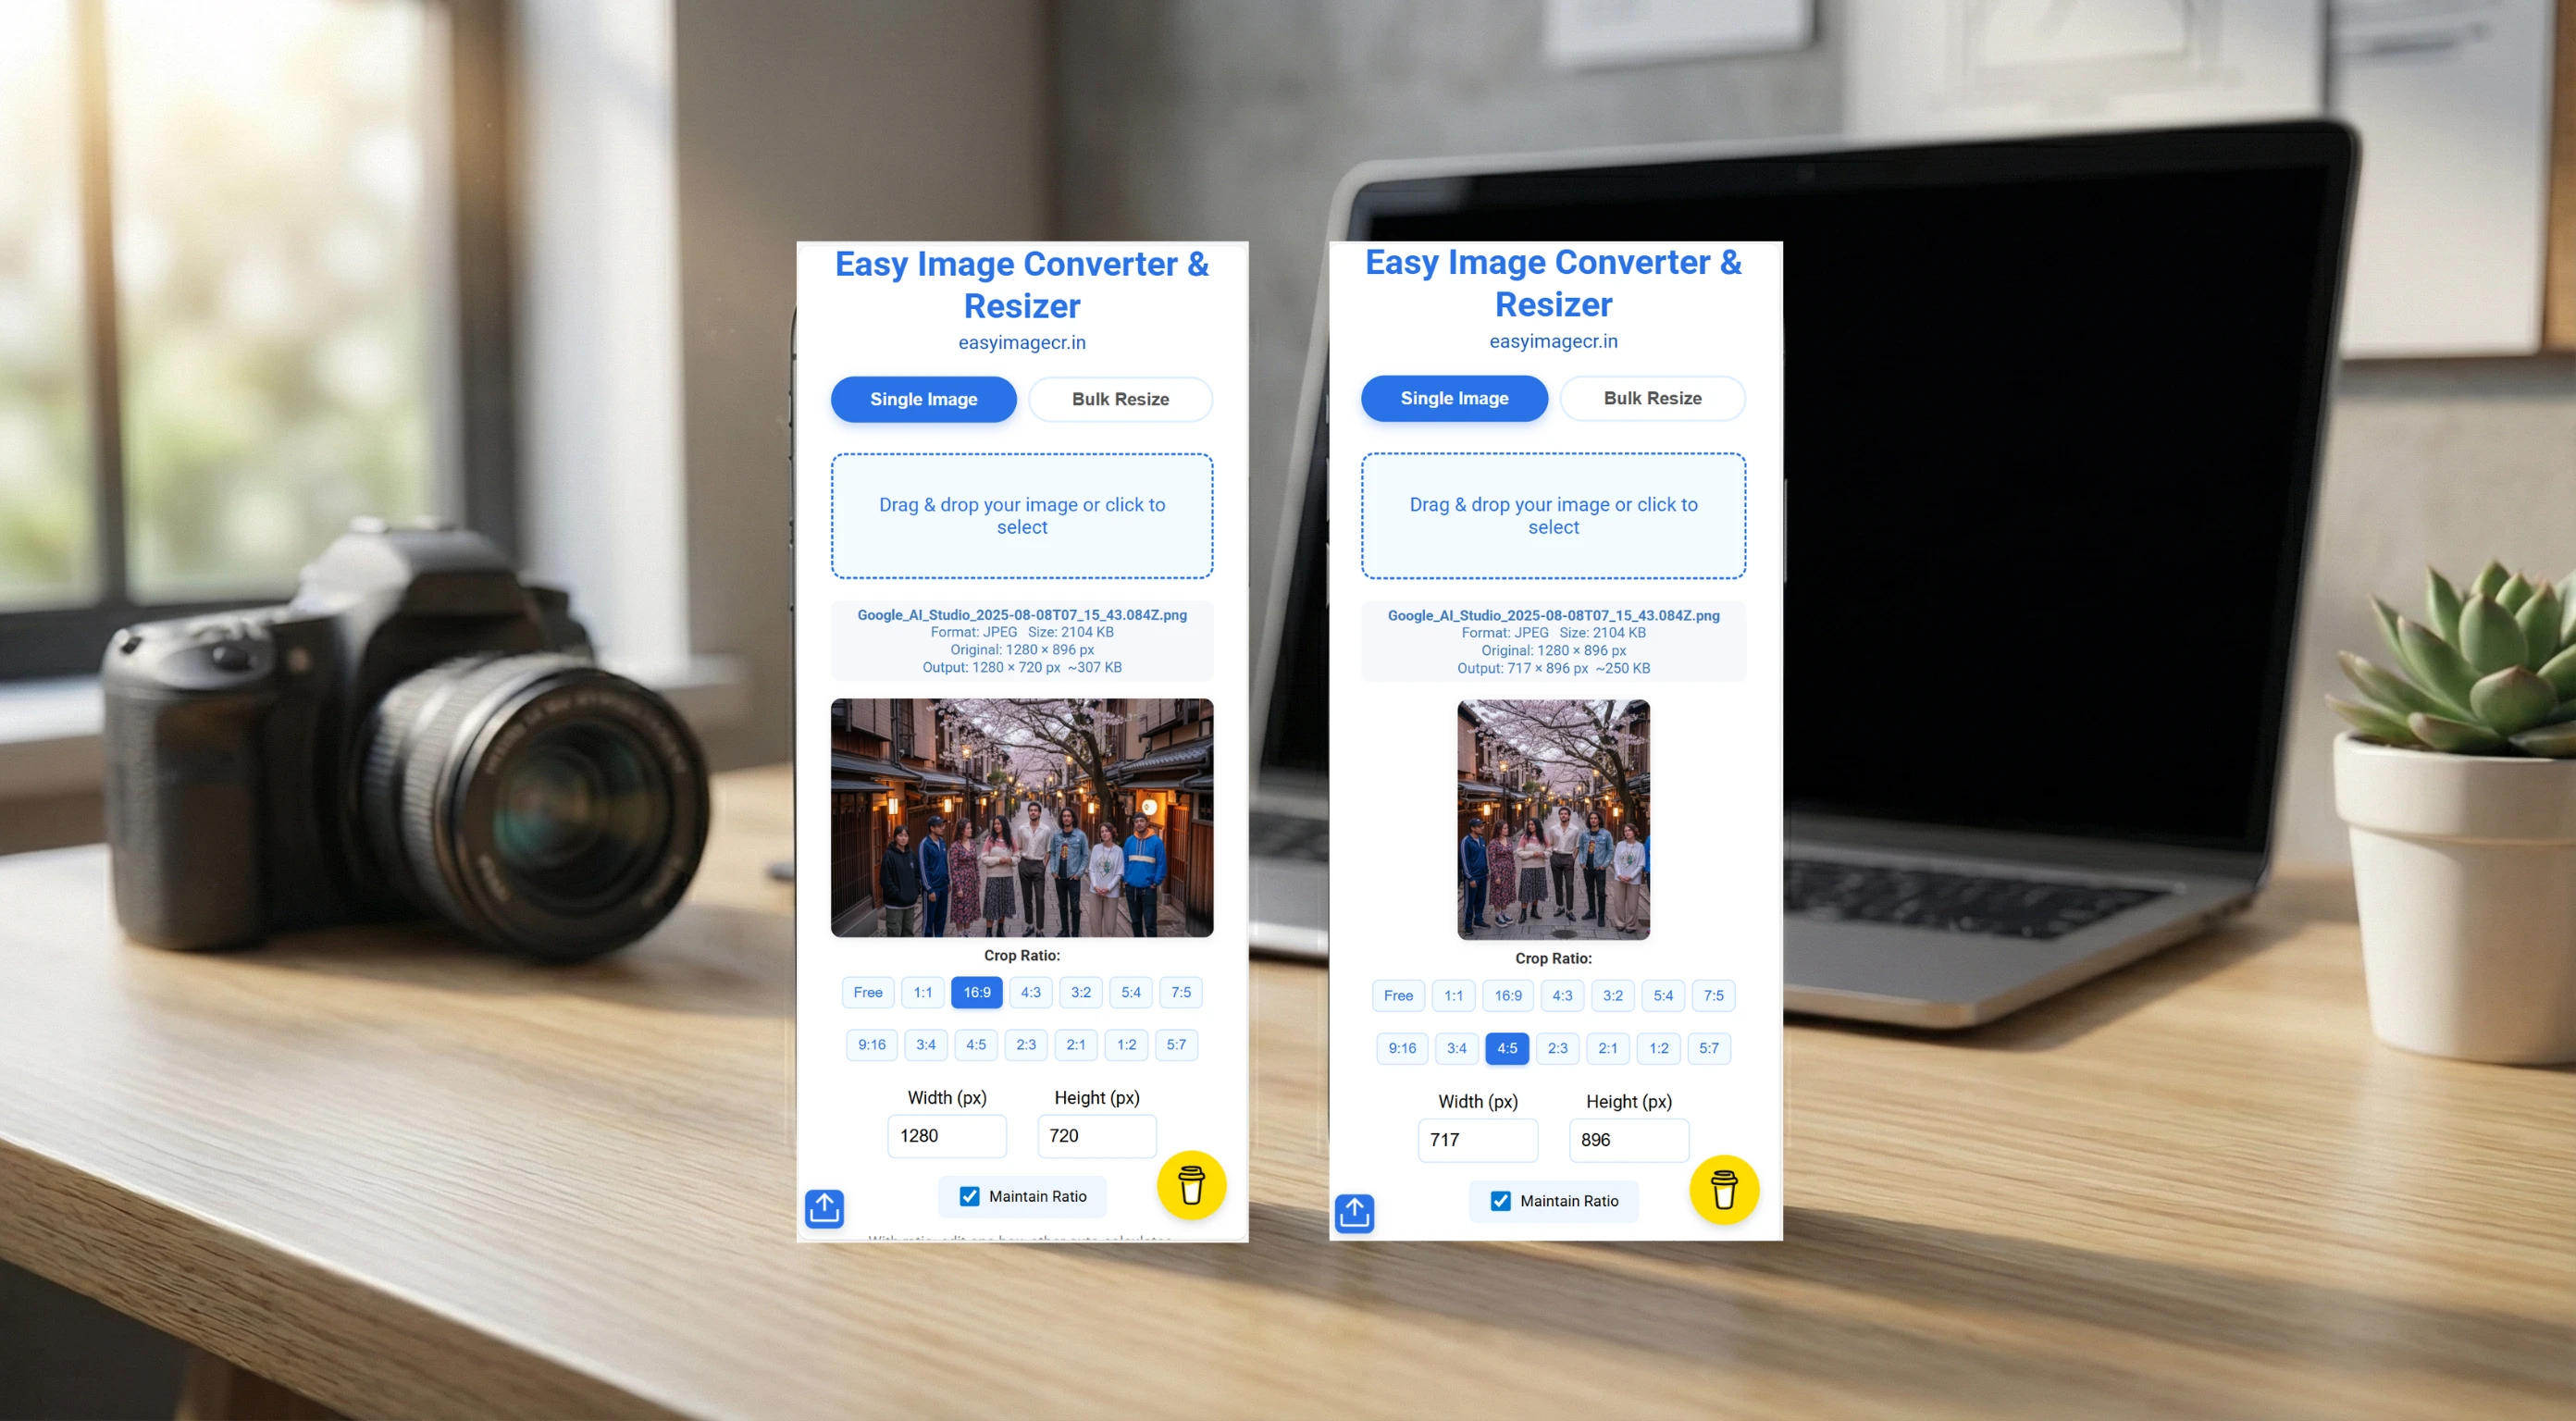
✅ How to Crop Instantly (The 1-Click Method)
You don't need to calculate pixels or guess the shape. We have added specific buttons for all these ratios to our homepage.
Step 1: Upload Your Photo
Go to EasyImageCR.in and drag your image into the box.
Step 2: Click Your Target Ratio
Look at the new "Crop Ratio" buttons below the preview.
- Posting to Instagram? Click the "4:5" button.
- Making a YouTube thumbnail? Click "16:9".
- Updating LinkedIn? Click "1:1".
Step 3: Resize & Download
If you need a specific size (like 1080px width), enter "1080" in the Width box. Then just click "Resize & Download".
Pro Tip: Center Your Subject
Our tool uses "Center Cropping," which keeps the middle of your image and trims the edges. Before you upload, make sure the most important part of your photo (your face, the product, etc.) is roughly in the center. This ensures the 1-click crop works perfectly every time.
⬅ Back to Blogs